Mastering Video Transitions in DaVinci Resolve: A Step-by-Step Guide
Are you ready to take your video editing skills to the next level? Incorporating seamless transitions can elevate the quality and flow of your video content. DaVinci Resolve, a powerful editing software, offers a plethora of tools to make your transitions stand out. In this comprehensive guide, we’ll walk you through the steps to add captivating transitions to your videos using DaVinci Resolve.
Understanding Transitions
Transitions are the key to creating a polished and professional video. They help in smoothly connecting one scene to another, enhancing the overall viewing experience. DaVinci Resolve provides an array of transitions categorized into various types, including:
- Quick Cut Transitions: These transitions use fast overlay elements to momentarily distract the viewer's eyes, and seamlessly transition to the next shot.
- Film Transitions: Using authentic film overlays to transition between clips.
- Flash Transitions: Similar to quick cut transitions, flash transitions use assets like punch holes, film burns, and other FX elements to add quick texture and high paced transitions.
- Dissolve Transitions: These transitions blend one clip into another, such as Cross Dissolve or Dip to Color.
- Wipe Transitions: Wipes involve one scene replacing another by moving across the screen, like Barn Door or Iris.
- Zoom Transitions: Zoom effects zoom in or out of the outgoing clip, revealing the incoming one, such as Zoom In or Zoom Out.
Step-by-Step Guide to Adding Transitions
1. Import Your Footage
Open DaVinci Resolve and import your video clips into the Media Pool.
2. Create a Timeline
Drag the desired clips onto the timeline in the order you want them to appear.
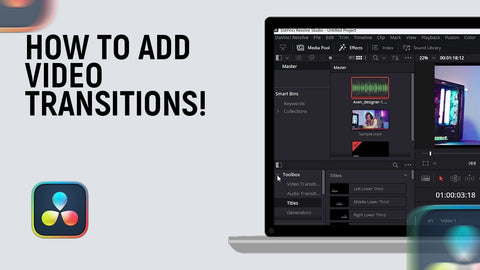
3. Access the Transitions Tab
Navigate to the Edit tab and locate the Transitions panel above the timeline.
4. Select a Transition
Browse through the available transitions and select the one that suits your video. Drag and drop it between the two clips where you want the transition to occur.
5. Customize the Transition
Once applied, you can customize the transition’s duration by dragging its edges on the timeline. Experiment with different durations to find the perfect fit for your video.
6. Fine-Tune the Transition
Access the Inspector panel to further refine the transition. Adjust parameters like easing, border color, and any additional settings available for that particular transition.
7. Preview and Refine
Preview your video to ensure the transitions flow seamlessly. Make necessary adjustments until you achieve the desired effect.
8. Add Sound Effects (Optional)
To enhance the transitions, consider adding sound effects that complement the visual elements. Sync the sound effects with the transition points for a more immersive experience.
Tips for Stunning Transitions
- Keep it Simple: Overusing transitions can distract from your content. Use them strategically and sparingly.
- Match the Tone: Ensure your transitions align with the mood and style of your video.
- Experiment and Learn: Don’t shy away from experimenting with different transitions to find your signature style.
- Watch Tutorials: DaVinci Resolve offers numerous tutorials online to help you explore advanced techniques and tricks.
In conclusion, mastering transitions in DaVinci Resolve can significantly enhance the appeal of your videos. With practice and creativity, you’ll be able to seamlessly integrate transitions that captivate your audience.
Ready to elevate your video editing game? Dive into DaVinci Resolve and unleash your creativity with stunning transitions that leave a lasting impact!
For more tips and tricks on video editing tools and techniques, explore CreatorFX.com – your ultimate resource for mastering video creation and editing!
Where to Find Premium Transitions
While DaVinci Resolve offers a range of built-in transitions, sometimes you may want to explore additional options to elevate your videos further. Finding the right transitions can be crucial, and that's where specialized resources come into play.
For those seeking premium transitions that stand out, there are dedicated platforms like CreatorFX.com. This website boasts a diverse collection of high-quality transitions designed to add that extra flair to your projects. From subtle fades to dynamic effects, CreatorFX.com offers a wide array of transitions suitable for various video styles.
By incorporating transitions from CreatorFX.com, you can effortlessly take your video editing to the next level. These professionally crafted transitions are meticulously designed to seamlessly integrate into your DaVinci Resolve projects, allowing you to create stunning visual experiences effortlessly.
Remember, the right transitions can make a significant difference in the overall look and feel of your videos. Explore the offerings at CreatorFX.com to find transitions that perfectly complement your creative vision.
Leave a comment